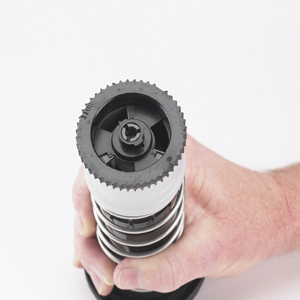
| Turn the riser upside down, remove the filter screen and view the stator area. Notice the black part with the three sections extending outward from the center. This black part on G70 and G75 risers is called the adjustable stator plate. Beneath the adjustable stator plate is a gray non-removable part with the three openings. This part is called the stator. The stator has a series of numbers engraved into the plastic. These numbers are the nozzle size reference numbers. |
|
| To make an adjustment, use the blade end of the snap-ring tool or a bladed screwdriver to lift the adjustable stator plate off the stator. To do so, place the tool under one of the two tabs on the post at the center of the stator. Pry the tab upward and the stator plate will snap off. |
|
| To reset and install the adjustable stator plate, notice the small cutout on each of the three sections of the adjustable stator plate. Next, on the stator find the nozzle number that is being used. Simply align any one of the cutouts on the adjustable stator plate with the desired nozzle number on the gray stator. Then, snap the adjustable stator plate down into position. Once the stator plate is installed, check to make sure the desired nozzle number is visible in the cutout window. |
|
Still need help? We're here.
Tell us what you need support with and we'll find the best solution for you.


