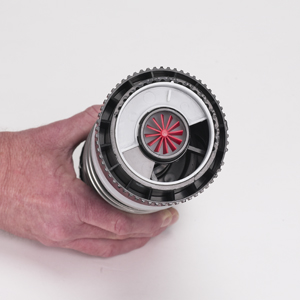
Turn the riser upside down, remove the filter screen and view the stator area. Notice the white plastic part that is set within the bottom of the riser (fig 62). This white part on G90 and G95 risers is called the adjustable stator plate. Beneath the adjustable stator plate is a black non-removable plastic part with the opening in the center for the turbine and the single opening to the side. This part is called the stator. The outer ring at the base of the riser has recessed notches all the way around it. Notice that the white adjustable stator plate has a protrusion that is engaged with one of these recessed notches. This protrusion is the adjustable stator plate’s pointer. Also notice there is a series of numbers engraved into the plastic next to some of the recessed notches. These numbers are the nozzle size reference numbers.
To make an adjustment, first find the raised wall or blade of plastic on the adjustable stator plate. Use pliers to grab the plastic blade then pull to remove the white adjustable stator plate from the riser (fig 63). To reset and install the adjustable stator plate, find the nozzle size reference number on the outer ring that matches the installed nozzle. Simply align the pointer on the adjustable stator plate with the desired nozzle number on the outer ring. The pointer can be placed on either side of the nozzle reference number (fig 64). Next, snap the adjustable stator plate down and into position. Once the adjustable stator plate is installed, check to make sure the desired nozzle size reference number aligned with the pointer. Finally, install the filter screen as outlined above.


Still need help? We're here.
Tell us what you need support with and we'll find the best solution for you.

