The P2C controller is supplied with a base 4-station module. The P2C is also compatible with the EZ Decoder System (EZDS) for hybrid conventional and two-wire operations. Add a Decoder Module (PC-DM) to enable control for up to 32 total stations. This system uses the same EZ-1 decoders used with ICC2 and HCC controllers.
- Slide the “Power Lock” into the “Power Off” (unlocked) position. Insert any additional station modules into the appropriate output slots.
- Once all of the modules are in place, slide the “Power Lock” into the “Power On” (locked) position to energize and secure the modules into the controller.
- The P2C will automatically recognize the correct number of stations. Sometimes, pressing the reset button on the back of the facepack or cycle power to the controller may be necessary.

The PC-DM can only be installed in the last two station output slots (similar to PCM-900 and PCM-1600 installation). The PC-DM will not physically fit or operate in any other station output slot.
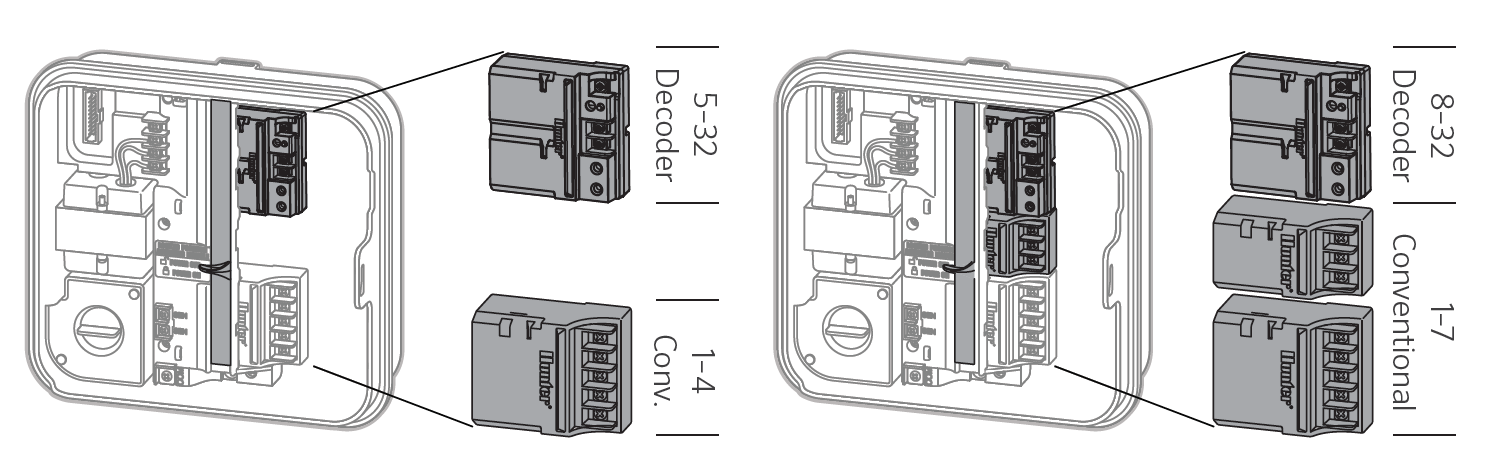
IMPORTANT: While the addition of this module increases total station count to 32, the first 4 stations cannot be programmed as decoders and must be wired conventionally to the 4-station master module. This leaves stations 5–32 available for EZ decoder operation. This allows for hybrid conventional/decoder operation. If only EZ decoders are to be used, there are 28 total stations available, and the first station must be programmed as station 5.
As shown below, if stations 1–4 are conventionally wired, then stations 5–32 would be available for two-wire via PC-DM. Similarly, a 3-station PCM-300 expansion module could be added to the second station output slot, which would allow for stations 1–7 to be conventionally wired, and stations 8–32 available for two-wire.
- Remove wire insulation, and insert red and blue wires from the decoder into the programming port (it doesn’t matter which wire goes into which hole).
- Manually start the station you want to assign to the decoder. This can be done using the controller face panel or remote control, if so equipped.
- When the station is running, push the “PRG” button on the PC-DM. The LED on the PC-DM and on the EZ-1 decoder will flash green once to indicate the decoder has been programmed.
- To assign a decoder as a P/MV, complete steps 1–3; however, don’t start any stations.


Still need help? We're here.
Tell us what you need support with and we'll find the best solution for you.