Below you will find useful information and practical tips. If you still need assistance, please proceed to the end of the page to view our contact options. We at Hunter Industries appreciate your business and are dedicated to providing quality products and service.
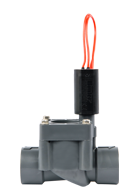
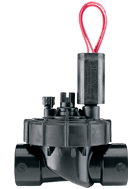
Residential Valve Identification Chart
It is possible that you have debris in the valve, which is causing it to remain open. To fix this, you'll need to disassemble the valve, rinse all the parts with clean water, and re-assemble the valve. If you cannot locate your valve boxes or fix the valve, it is recommended you contact the contractor who installed the system, or use our Professional Contractor Referral page to help find a professional contractor in your area.
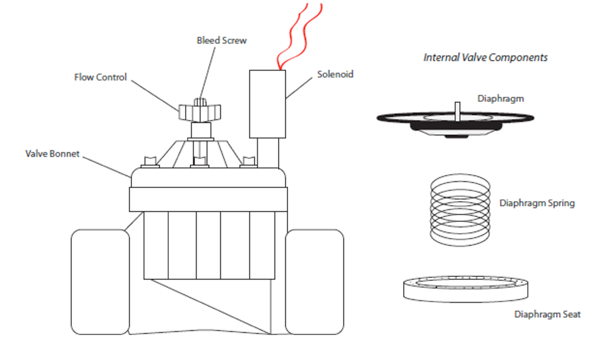
It is possible that your valves have been opened manually. You will need to locate your valve boxes and twist the solenoid(s) on the valves clockwise until snug. The solenoid is located on the top of the valve and looks like a cylinder with two wires coming out of it.
It is possible that you have debris in the valve, which is causing them to remain open. To fix this, you'll need to disassemble the valve, rinse all the parts with clean water and re-assemble the valve. If you cannot locate your valve boxes or fix the valve, it is recommended you contact the contractor who installed the system or visit our Professional Contractor Referral page for help finding a company in your area.
Simply twist the solenoid (the black cylinder with 2 wires coming from it) on the valve counter-clockwise 1/4 to 1/2 a turn. To shut off the valve, twist the solenoid clockwise until it is snug on the valve.

- Turn the controller to "System Off" so it does not try to cycle a program.
- Shut off the main water supply. Opening a valve under pressure is dangerous and you could be injured.
- Unscrew the solenoid (cylinder with two wires) and make sure the plunger is clean and moves freely. You can test the solenoid by running that station manually from the controller and see if the plunger retracts when energized.
- Unscrew the bonnet screws or jar top depending on your valve model. Be careful when you pull the bonnet away from the body as to not lose the diaphragm or spring.
- The diaphragm may be sitting in the body or captured in the bonnet. Remove the diaphragm and spring. Make note of the orientation of the diaphragm so you can put it back together the same way it came out.
- Examine the diaphragm and spring. The diaphragm should be clean and free of wrinkles, tears, or perforations. The seal should be clean and free of nicks, dents or abrasions. Wash the diaphragm with clean fresh water to remove any debris that may have been deposited there.
- The diaphragm spring should be intact and bounce back when compressed.
- Examine the valve body and remove any debris, pebbles, or dirty water.
- The seal seat should be clean and free of nicks, grooves, or abrasions.
- Examine the porting in both the valve body and the bonnet. All ports should be clear and pass water freely. A small piece of flexible wire can be passed through the ports to remove blockage.
- Reassemble the valve in the reverse order of how it was taken apart. The diaphragm should sit with the lip in the matching groove on both the body and the bonnet. The screws or jar top should be hand tightened. Over tightening can damage the valve.
STILL NOT FINDING THE ANSWERS?
Hunter Technical Support experts are available to answer your question(s) about Hunter products and their usage, simply click on the contact button below to submit an email request.


