The water may contain foreign objects such as sand, rocks, and other impurities, which can damage the rotor. To avoid these problems, you may need to install a filter. Troubleshooting non-rotation after installation: Check for plugged secondary nozzle and a blocked propeller in the turbine assembly.
Replacing the Cover and Rotor
- Remove the center plug with a flat blade screwdriver and unscrew the nut underneath using a 1/2" (13 mm) socket.
- Use the gear-drive insertion/ removal tool to unscrew the rotor from the piston. The tool will grab onto the screws below the rotor.
- Turn the wrench counterclockwise until the unit is free from the threads.
- Lift the unit out of the body.


Replacing the Propeller and Checking for Debris
- Remove the eight screws on the turbine housing (six large, two small).
- Pull to remove the propeller cover and expose the propeller.
- Remove the propeller from the housing to clear any debris that may be trapped inside.


Speed Control Adjustment
- Turn the brass knob clockwise to slow down the rotation.

Servicing Secondary Nozzle
- Unthread the secondary nozzle.
- Clear any debris that may be trapped inside.


Arc Adjustment
The rotating nozzle turret on the rotor has a ratcheting feature that allows the nozzle to be rotated to the field of play.
- Pull up the logo cap or activate the rotor to expose the nozzle turret and forcefully push the nozzle as needed.
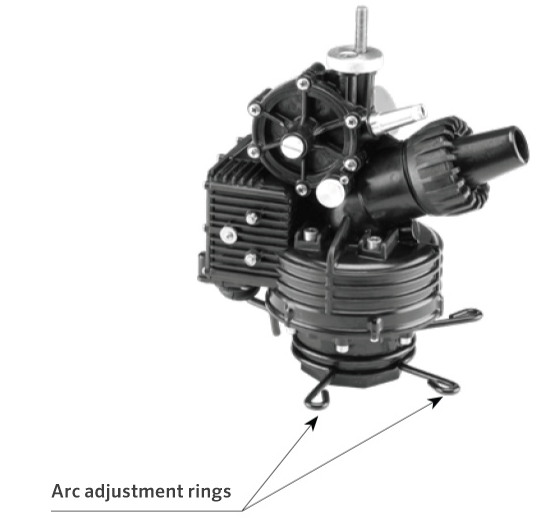
- The nozzle turret will ratchet unless the arc adjustment clips interfere with the reversing trip arm on the back of the gear drive.
- If necessary, slide the arc adjusting clips to move the turret. The arc adjustment clips are used to adjust the arc in a similar fashion to impact-type sprinklers.
- To adjust the arc, activate the rotor and adjust the arc adjustment clips to set the arc to the intended area to be irrigated.
- The trip arm on the back of the gear drive can be moved manually to speed up the process.

Still need help? We're here.
Tell us what you need support with and we'll find the best solution for you.

