After Solar Sync has been installed and programmed, it is recommended to allow the system to run for a few days at the initial setting.
Because of the variety in site conditions (including sensor location, amount of direct sunlight available to the sensor, reflective heat from surrounding structures, etc), the initial setting may require adjustment in order to arrive at the desired performance. The calibration of the Solar Sync to a particular site can easily be accomplished by adjusting the Region and/or Water Adjustment settings. The instructions below outline this process:
- Install Solar Sync sensor.
- Program Region and allow system to operate at initial setting for a minimum of 3 days.
- Observe the Seasonal Adjust on the controller. If the Seasonal Adjust amount appears to be lower or higher than expected for that time of year, the Solar Sync settings need to be adjusted.
- Seasonal Adjust too low: Turn the dial to the SOLAR SYNC position. Increase the value on the Water Adjustment scale (10 is max). Once the setting is changed, the controller will immediately be updated with the new Seasonal Adjust %. Increase the Water Adjustment setting until the desired Seasonal Adjust % is shown. If you max out the Water Adjustment scale at 10 and still require more Seasonal Adjust, move down to the next lower Region (from Region 4 to 3, for example).
- Seasonal Adjust too high: Turn the dial to the SOLAR SYNC position. Decrease the value on the Water Adjustment scale (default setting is 5). Once the setting is changed, the controller will immediately be updated with the new Seasonal Adjust %. Decrease the Water Adjustment setting until the desired Seasonal Adjust % is shown. If you minimize the Water Adjustment scale down to 1 and still require a reduction in Seasonal Adjust, move up the next Region (from Region 2 to 3, for example).
Station Run Times: It is important to understand that Solar Sync provides a global seasonal adjustment to the controller. This means that all station run times will be modified by the seasonal adjust percentage shown. When programming the controller, the run times should be entered that represent peak season watering schedules. If the Solar Sync is adjusting to the appropriate seasonal adjust value but the run time for a particular station appears to be too long/short, adjust the station run time in the controller program.
NOTE: On the older model Pro-C controllers (green buttons) the Region and Water Adjustment is made on the Solar Sync Module.
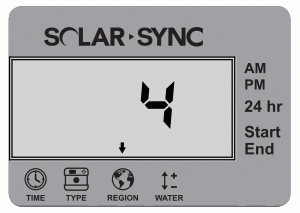
Region
For accurate measurements, the Solar Sync module needs to be programmed for the typical ET (average July ET) for your region. Press the button until the arrow is displayed over the globe icon. Use the or button to select your region (regions 1 through 4).

Watering Adjustment
If you find that your landscape is "wetter" or "drier" than it should be, a watering adjustment function is provided to adjust watering equally to all stations. Use the button until the arrow is displayed over the water icon icon. Use the or button to increase or decrease the amount of watering scaled 1 to 10 (1 for less water and 10 for more water). Hunter recommends observing performance carefully over the first weeks of operation before adjusting the watering.
Still need help? We're here.
Tell us what you need support with and we'll find the best solution for you.