The X-Core Controller is programmed with Solar Sync technology and, therefore, does not require the use of the Solar Sync module.
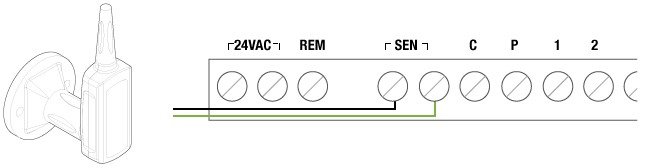
Installing the Wireless Solar Sync Sensor
Simply mount the Wireless Receiver on the controller cabinet using an available knock out and secure with the supplied conduit nut. Or, use the supplied brackets to mount the Wireless Receiver on the wall, similar to the Pro-C installation shown on page 8. Depending on the installation, the supplied 1.5" (3.8 cm) extender may be required. Route the wires from the Wireless Receiver in to the controller cabinet.
- Make sure power to the controller is turned off
- Remove the metal jumper plate (if installed) from the sensor terminals.
- Connect the black Receiver wire to the “SEN” Terminal location (it does not matter which “SEN” terminal is used).
- Connect the green Receiver wire to the other “SEN” terminal location
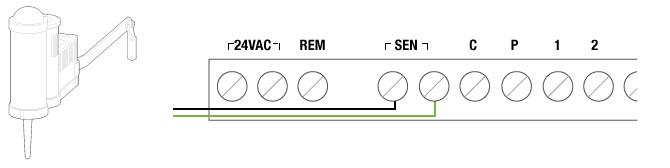
Installing the Wired Solar Sync Sensor
Route the wires from the Solar Sync sensor in to the controller cabinet.
- Make sure power to the controller is turned off
- Remove the metal jumper plate (if installed) from the sensor terminals.
- Connect the black Receiver wire to the “SEN” Terminal location (it does not matter which “SEN” terminal is used).
- Connect the green Receiver wire to the other “SEN” terminal location
Still need help? We're here.
Tell us what you need support with and we'll find the best solution for you.