The communication module connection to the ACC2 facepack changed, effective with a facepack manufacturing date code May 2022 and later. The new facepack now has a separate communication connection on the rear of the facepack. The 1st Generation units have the connection directly in the module slot on the bottom of the facepack.
| 1st Generation | 2nd generation |
|---|---|
 |
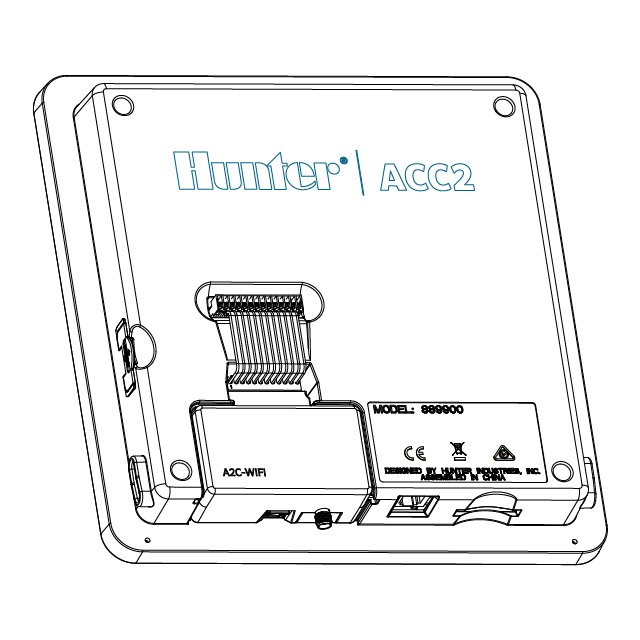 |

- Turn controller power Off.
- Insert Ribbon Cable into module slot.
- Insert the Communication Module in the slot at the bottom of the facepack. Note: This will not make the electrical connection with the new facepack design.
- Connect the Ribbon Cable from the communication module to the receptacle on the back of the facepack.
- Connect the Antenna or network cables as usual to the module. Learn more
- Turn controller power On.
IMPORTANT: Communications modules included the ribbon cable in all models dated June 21 or later. This includes A2C-LTE, A2C-LAN, A2C-WIFI, and A2C-CELL-E. For older communication modules that did not include the ribbon cable, email Hunter Technical Support for a compatible ribbon cable (Hunter part 10026200). This ribbon is ONLY required for newer style ACC2 facepacks.
Still need help? We're here.
Tell us what you need support with and we'll find the best solution for you.