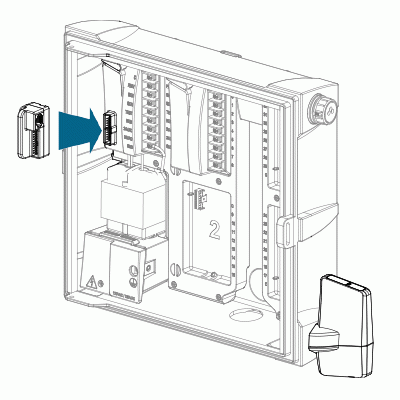
Installing Ethernet Adapter

- Turn off the AC power to the controller.
- Disconnect the ribbon cable from the power module in the upper left side of the controller.
- Plug the LANKIT adapter into the power module.
- Plug the ribbon cable from the facepack into the adapter.
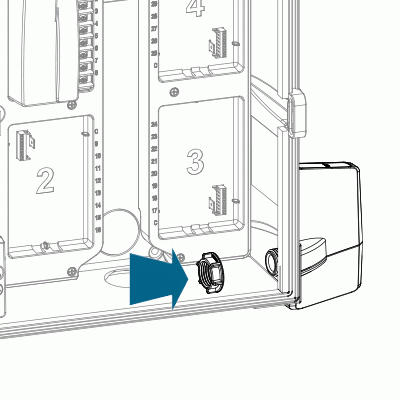
Installing LAN Module

- Remove the knockout (for plastic enclosures) or rubber plug (for metal enclosures) on the lower right side of the controller cabinet.
- Route the LANKIT cables through the opening and through the included plastic nut on the inside of the controller. Secure the LANKIT in place with the nut (finger-tighten only).
Installing Ethernet Cables

- Connect the gray data cable from the LANKIT to the ribbon cable adapter.
- The individual red and black wires are used for the Flow Sync only. Simply fold them out of the way if not installed.
- Route an Ethernet cable from your router into your ICC2 controller. You can use any open knockouts on the bottom of the controller to get the cable into the cabinet. Using the supplied female x female Ethernet cable adapter, connect the cable from your router to the black cable coming from the LANKIT.
- Restore power to the controller and verify that a light appears on the LANKIT.
CAUTION: Never plug the shorter, black network cable into the controller’s ribbon cable adapter. This will permanently damage the LANKIT.
Still need help? We're here.
Tell us what you need support with and we'll find the best solution for you.

